Wednesday, October 31, 2012

A Perfect Gift Idea For Someone Who Has Everything:: Alphabet Photography

With Christmas just around the corner (hello, 53 days and counting!) we all know the infamous Gift Scramble For Someone Who Has Everything that often occurs and I'm sure we all have that certain someone on our list who sends us into that scramble each and every year. I know I do and this year I know exactly what I'll be buying them. 


Contemporary, sophisticated and elegant, Alphabet Photography is the perfect accent piece for any room in your home. Completely unique and customizable, you can create your own word or name using 1000 photographs from around the world

A "just because" gift for my Dad, there was no question when it came to choosing the perfect word. "LYMTC" now proudly hangs on the wall of his home office and let me tell you, my Dad is totally that guy. He's the guy on my list who has just about everything and he was absolutely speechless when he pulled this incredible piece of artwork from its carefully packaged box. 

The artwork he received has a solid 4" contemporary wood frame with an espresso finish and although my Dad is a fairly contemporary kind of guy, this artwork would look just as good in any setting be it modern or traditional.  

Let it be said that I am a sucker for pretty packaging and Alphabet Photography goes above and beyond when tying up their artwork with a pretty bow. Unfortunately, I was so excited to have my Dad tear into his gift that I completely forgot to snap a picture of the wrapping! You can check out Alphabet Photography's fantastic wrap-job here


Matted with a museum quality double mat with a V groove and hand signed and dated by the artist, this piece or artwork is truly one of a kind. I couldn't help but feel a slight twinge of jealousy as I read about how Jennifer Blakeley, the founder of Alphabet Photography, spent most of the years 2006 and 2007 traveling North America collecting photographs that resembled the letters of the English alphabet. To know that every single one of her photographs is taken of objects in their natural surroundings, completely un-Photoshop'ed is absolutely incredible. 

To learn more about how Alphabet Photography is created, check out this behind the scenes look into the high quality and special care that goes into making the original photo letter art:


From professional photographs collected from landmarks world wide, to custom framing each and every order, Alphabet Photography is proud to add their quality checked seal of approval to each piece of unique Alphabet Photography. 

Ordering is super simple and can be done so by visiting Alphabet Photography's website here. Simply enter your chosen word or name and click on each letter to view multiple options in the gallery. Once you've decided on the unique images that will serve as the letters of your chosen word or name, continue through the website to choose the perfect mat and frame for the recipient of this one of a kind gift.

Remember, 53 days and counting! Happy shopping!


The perfect customized gift that includes photographs from all over the world, this is the original Alphabet Photography. Celebrity owners include: Prince Charles, Prince William and Kate, Tyra Banks, Ryan Seacrest, Canadian Prime Minister Stephen Harper, John Schneider, Nelly Furtado, and many more! This is a sponsored post written by me on behalf of Alphabet Photography. The opinions and text are all mine.


Monday, October 29, 2012

Holiday Ornament Wreath :: Hey, That's Pintastic!

I can't believe it's Week Seven of "Hey, That's Pin-tastic!" More than 215 posts have linked up during these past few weeks and I've easily gained 10lbs. baking and eating everything that you've all made with some sort of pumpkin concoction

If you're linking up, thank you! Be sure to grab the official "Hey, That's Pin-tastic" button and embed it in your post. This way everyone can come back here and see all of the Pin-tastic stuff going on. Also make sure you're following my HTP pin board where I'll continue to pin each of the posts that links up. 


With "Frankenstorm" Sandy on our heels here in New Jersey, I wasn't able to make it to the craft store this weekend and the DIY Christmas ribbon wreath which was supposed to be this week's "Hey, That's Pin-tastic" post is still sitting slightly unfinished on the dining room table back home in Maryland. So? Today you're getting a post pulled from the ILYMTC archives. It may be an oldie but I promise you it's a goodie, too. 


Today I'm sharing the jolly and super adorable DIY Christmas Ball Ornament Wreath that I whipped up last year and can't wait to hang on our new front door this year. You can find the inspiration for this wreath by checking out this pin here


What You'll Need:

1 Floral Foam Wreath Form
1 Hot Glue Gun
1 Brand New Bag of 100 Glue Sticks (appropriate to glue gun size)
Ribbon, color and thickness of your choosing
50-70 Shatter Resistant Ornaments in various sizes

What You'll Do:


Grab a coffee. Preferably an Egg Nog Latte. 
Spread out your wares and make a mess of your crafting space. 
Craft with a friend, in this case, my sister-in-love


Start by arranging your largest ornaments in desired pattern along the outside of your wreath. You'll have to hold and press your ornament against the wreath for a few seconds each time for maximum stick-age.

Follow suit along the inside of your wreath with the same size ornament in desired pattern.


Once completed, begin by filling in the spaces on the wreath with the next size ornament. Continue with a desired pattern or begin haphazardly gluing them down in whatever places they would fit, like yours truly. 

Once you've exhausted the medium size ornaments, it's time to begin filling in the little nooks and crannies with your smaller and smallest size ornaments. 

You'll soon note that you are no longer gluing ornament to wreath but rather gluing ornament to ornament. Don't fret, this just means you're doing it the right way. 

As for hanging your ribbon, no one cares to explain how to do this. I found it easiest to thread the ribbon through the ornaments and around the wreath form when finished. Thread two separate strands of ribbon and tie together in a knot at the top. 

Then? Enlist a friend to make you a beautiful bow. In this case, I'm still stuck on that last step. 


Tend to your burnt fingertips all the while 
rushing to the front door to hang and admire your handiwork. 

Happy Wreathing and be sure to link up your "Hey, That's Pin-tastic" posts below! 


Saturday, October 27, 2012

Five Years :: M + A


Five years ago on a beautiful Fall day on the 27th of October, surrounded by our most favorite family and friends, gathered together in the beautiful cathedral on the campus of Villanova University, I said "I do" to the curly-haired, blue-eyed fraternity boy I fell head over heels in love with just four years prior. 

It was on that day I proclaimed "I do" to a future I could only dream of.

To an incredible man. The absolute love of my life. The one who makes my sides hurt from laughing so hard. To the one who knows me inside and out and loves me all the same. To the one who drives me crazy like no one else could ever do.

To a 110lb. silly, loving and loyal Olde English Sheepdog. My most beloved companion during the years of travel and distance that once separated that incredible man and me. 

To three fantastic apartments in one state and to one beautiful home in another, each bursting at the seams with memories made inside their walls. To personally boxing up every single one of those memories and moving ourselves into and out of each and every one of those apartments, together.

To a breathtakingly beautiful blonde-haired boy who has grown into a wild-eyed, passionate, sensitive two year old. And most recently to our sweet brown-haired, doe-eyed baby who has brought so much more love and laughter into our lives than we could have ever thought possible. 

These last five years of marriage have been so full. Full of living. Of laughter. Of love and sacrifice. Of seeing far off places. Of compromise.  

No matter what we did, we did it together

Not a day goes by that I don't think about how I'm living a life I only once dreamed of.

Five years. Wow. Happiest of anniversaries to you, my darling husband. I love you this much. 

Friday, October 26, 2012

I'm Addicted To Pretty Paper :: A ($137) Minted Holiday Card Giveaway


Hi, my name is AP and I have an unhealthy obsession with fine paper goods. It has been approximately one month and two days since I've purchased a flat note card. No, really.

If there ever was a 12-step program for stationery hoarding, I would need a sponsor immediately. How bad is my addiction, you ask? Let's just say that each of my boys had multiple sets of monogrammed and personalized stationery even before they were born. 

From flat note cards to mommy calling cards, to blog business cards, thank you notes and just because cards, I'm a sucker for pretty paper.

If you're new to these parts, this isn't the first time I've raved about how much I love Minted. They are responsible for fueling my paper addiction and have added plenty to my collection over the last year. Most notably last year's Christmas cards, my personal mommy calling cards, blog business cards and even sweet Valentines sent from Carter earlier this year. 

If repeat business isn't a sign of great customer service and unmatched quality, I don't know what is.

Playroom     Lovely

"What makes Minted so unique," you ask? Each and every single one of their designs is sourced from indie designers all over the world. In fact, that's what is most important to them. Fine paper and a really good design. How does one argue with that?

Not to mention how incredibly user-friendly their website is. Within seconds I can easily narrow down my search options to include one photo flat cards with full bleed photo style in the exact price range I desire. And? I get to personalize it and customize it right down the font color, shape and layout of the back of the card. It's like having my own personal holiday card shopper. Amazing.

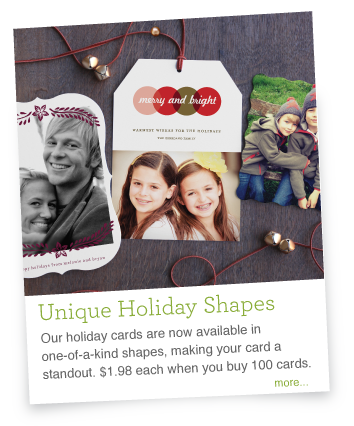
This year Minted has launched some pretty awesome new holiday card designs. Not only have they launched a super adorable line of holiday postcards but also 9 new shapes, making your card an absolute standout among the rest. 

Isn't that what we all strive for? Everyone looking in the same direction, a spit-up free sweater and to have the best card ever to hang on the fridges of family and friends? It goes without saying that we'll be using Minted once again for this year's M Family Christmas card.  

With Minted, I don't have to stress about the quality of the card, the thickness of the paper, the texture of the print. I know no matter what design I choose, our cards will be classic, elegant and timeless. Wishing our family and friends many blessings this season, good tidings and cheer and printed on signature paper, guaranteed to leave a lasting impression.

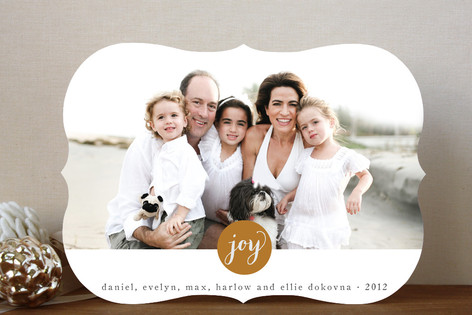
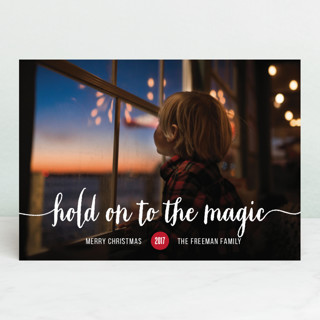
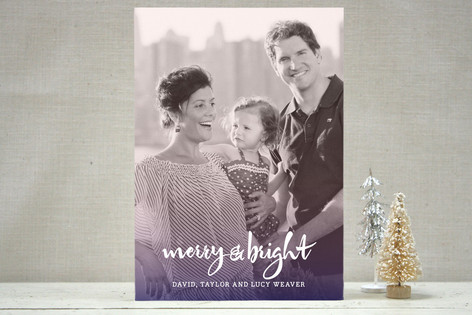
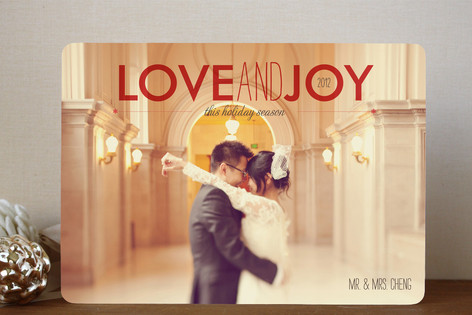
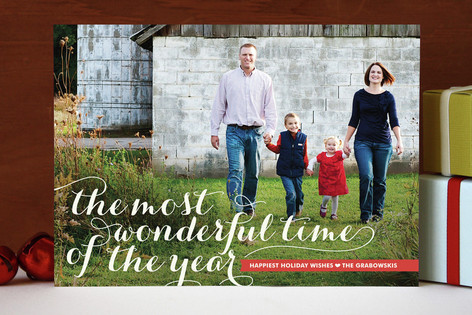
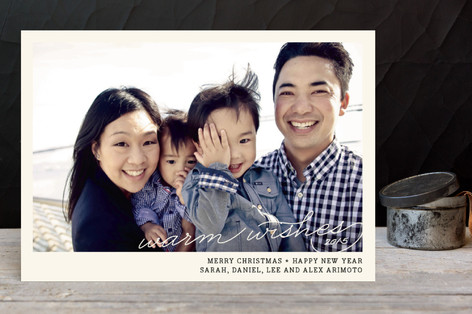
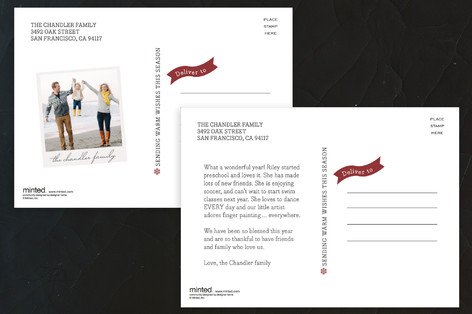
Here are just a few of my favorite Minted designs of 2012:

Magical Holiday Photo Cards
simple joy :: magical holiday

Ombre Tidings Holiday Photo CardsHoliday Bliss Holiday Photo Cards
ombre tidings :: holiday bliss

wonderful script

Vintage Photograph Holiday PostcardsVintage Photograph Holiday Postcards
vintage photograph holiday postcard

I'm going to have to play a game of Eenie Meanie Miney Mo or else I don't know how I'll ever choose just one design! I love them all! 

The kind and wonderful folks at Minted have offered one lucky Loyal the chance to win 75 FREE flat holiday cards, a giveaway valued at $137. Pretty incredible, huh? I wasn't kidding when I said how much I love them! 

Be sure to use the Rafflecopter widget below to easily enter for your chance to win. 


a Rafflecopter giveaway

Thursday, October 25, 2012

On Blogging, Judgment, The Un-Blogger and Why I Blog.

It's a funny thing, blogging. 

Sitting down to a blank computer screen to document your every days and your some days. Your Mondays, run-of-the-mill days, your best days and your worst days. Willingly sharing these days with strangers and in doing so, opening up not only yourself but also your heart, your home and your families to judgment and criticism.  

In the four years that I have been writing behind I Love You More Than Carrots, I have been judged both for my words and for my actions. I have been called names by strangers who think they know me based solely on what they've read, what I've chosen to share. Strangers who pass judgment behind the veil of anonymity.

I have been judged for the way I write. For what I write. Decisions I have made regarding how to feed my children have been criticized. My appearance and confidence judged more times than I can count on two hands. And shockingly enough, personal decisions regarding how I mother my children and keep house have also been the target of a derisive remark or two. 

Un-bloggers, or rather those that don't blog, assume that because we [bloggers] so often "put it all out there" that we should be able to accept any and all judgment that comes our way, regardless of how harsh it may be. That it is something we should tolerate and accept. After all, "we choose to share." 

I'm here to say that a blogger's skin is none the thicker.  

It's true. We write willingly. We share what we want to share, when we want to share it but that doesn't mean our willingness to share should be synonymous with accepting hateful comments and harsh criticism. 

Now, don't misconstrue the nonacceptance of hateful comments for lack of an encouraging debate. I'm all for the sharing of differing opinions and a responsible, respectful interaction. That's not what this is about.

Some days it seems that when people sit down behind their computers to read blogs, they suddenly feel empowered. Gifted with the uncanny ability to say and do whatever they want to whomever they want, often times saying things they wouldn't even dream of saying to someone face to face.

When they don't realize how much strength and courage it takes to literally sit down to a blank computer screen day in and day out to willingly share your days. To open yourself up to judgment and criticism. 

Un-bloggers don't understand it and truth be told? We can't expect them to. 

It's an incredible thing, blogging. To be surrounded by a community of inspiring and encouraging writers. Some days we all just need a little reminder to be respectful. 

Each day that I sit down to write- whether I'm spilling my heart, dropping a few too many four letter words or sharing with my readers The Next Best Thing, I'm constantly reminded how incredible this community can be. 


Wednesday, October 24, 2012

Nuby iMonster Feeding Set Review :: Official Nuby Mommy Blogger Business


Fish sticks and sweet potato fries. Does that scream "Toddler Meal" or what?

Take a moment to divert your eyes from Carter's delicious five-star dinner and check out that awesome dinnerware! Now, it's no Lenox Venetian Lace but it's most certainly dinnerware fit for a toddler king. 

Ever since the kind folks at Nuby sent us the iMonster feeding set to review, Carter continually asks for his "monstah" plate and bowl and who am I to deny him of those fun colors, fantastic quality and great durability?

What I love most about the iMonster Toddler Plate (2), iMonster Toddler Bowl (3) and iMonster Fork & Spoon (4) is that each of these products was designed to withstand the daily wear and tear of kids and their natural tendency to destroy things. 

Having been microwaved, hand washed and flung all around the kitchen, each of these products has maintained both their appearance and function. Carter loves their bright, bold colors as well as the silly monster face at the bottom of his iMonster Toddler Plate (2). 

Another great iMonster product from Nuby is the iMonster No-Spill Cup (1). With it's unique one piece, No-Spill soft silicone spout that is easy to use and easy to clean, it promotes natural drinking action and healthy oral development. According to the manufacturer, "the newly designed valve opens with minimum pressure and doesn't require constant sucking that can damage new teeth and soft palates. It also features an Easy Grip base that is perfect for a child's transition to self feeding."

This cup truly is "no-spill" provided the silicone spout is properly assembled. I learned this the hard way as Carter attempted to take a big swig of juice after I hadn't made sure that the silicone spout was tightly sealed inside the plastic O-ring. It was a complete user error on my part and once it was fixed, not a drip or leak to be found.

Lastly, in a constant never-ending battle to civilize the Toddler Beast, we've been encouraging Carter to eat with utensils rather than just his tiny toddler fingers. Not only is it important to have utensils that are safe for kids, but they should be specially designed to be easy for little hands to hold and use. These colorful forks and spoons are designed to meet all of those special needs for either left handed or right handed kiddos.

Each of these products is designed for use with cold or warm foods and with the exception of the iMonster No-Spill cup, is microwave safe. You can find these products at the following retailers: 

iMonster Toddler Plate: Buy Baby DirectAmazon
iMonster Toddler Bowl: Buy Baby DirectCookies Kids
iMonster Fork & Spoon: Buy Baby DirectCookies KidsAmazon
iMonster No-Spill Cup: Buy Baby Direct

Disclaimer: I was sent these products freely in exchange for my honest review as an official Nuby Mommy Blogger. I do not receive compensation for this post not do I receive compensation for any purchases made of these products.


The State Of Things And Pictures.

Let's see. I've fallen off of the 31 Days bandwagon but really, really enjoyed getting back to real, raw writing. If you've been reading ILYMTC for any length of time, you noticed that my 31 Days posts weren't my usual kinds of posts and it felt good to switch it up a bit. There has always been a writer in me beneath all that snark and it was clear she was itching to stretch her legs. But damn, does it not take time to actually sit down to do that. 

Speaking of time, where the hell has it gone? Maclane is four months old now and I'm still holding onto roughly 10-12 baby-weight pounds. I'm making excuses and sorely unmotivated to do anything about it. Especially because of this crazy idea floating around in my head. Maybe I'll eventually get around to writing up his 4 month post for memory's sake but right now? I just don't feel like it. 


But this having two kids thing? Is awesome. It's not that we've even settled into a routine or I've solved all the secrets of Toddlerhood and Getting Out The Door In Under Forty-Five Minutes because believe me, I've done neither of those things even remotely well, might I add. But I have found our groove and we take day trips and run errands and have fun and, well, it's just awesome. 

I love Fall. Like really, really love it. The crisp air, the beautiful leaves, the tasty pumpkin-infused cakes/muffins/coffees, not to mention the ability to wear pretty boots, chunky scarves and long sleeves without having to hide it all beneath a winter coat really floats my boat. I recently upgraded my camera and have been using it almost every day to capture my favorite season. 


 We've been to the pumpkin patch eight times already this year and I've taken no less than 400 pictures of the Obligatory Things You Do At A Pumpkin Patch. I've posted them on my personal Facebook page and shared a few of them on Instagram but again, do you really want to see 400 pictures of my family outings to the pumpkin patch? Probably not. 

Carter has his Halloween costume all set to go next week. Is it homemade? Hell no. Creative? Inventive? Pure genius? No, no and no. Store bought and overpriced out the wazoo which reminds me, I need to get to making Mac's matching costume. The brilliant idea came to me last night that I should have just dressed Carter up as a wheel of cheese and pulled him around in the wagon holding Mac. Get it? Mac and Cheese? Corny, I know. Last year Carter was a pumpkin and a cute one at that but I don't think anything will ever rival his very first costume, Charlie Brown.

Speaking of Carter, we've finally entered the "no" and "nuh-uh" phase and it's literally driving me out of my ever loving mind. I could go blue in the face asking him if he wants to eat something, do something, go somewhere, etc. and the answer is always a resounding, "No! Nuh-UH!" Which, of course, ten minutes later turns into a whiny ball of Toddler-ness as he's asking to do/eat/go just the precise thing I asked of him minutes earlier. 

I'm behind on emails, behind on posts, behind on a lot of things, really. But it's because business has been picking up and I've been really intentional with the time I'm spending with the boys. I don't attempt to write unless both of them are sleeping because if I even try to attempt it while they're awake it requires me stepping away from the computer 2,479 times and that's just no good for anyone. But I'll catch up. One day. 

So, that's about where we are. Physically we're in New Jersey visiting my parents and have been for a while now. We're heading back to Maryland soon, but not too soon. Oh and The Husband and I have a pretty exciting anniversary coming up this weekend. So there's that, too. This year's gift theme? WOOD. 

I'll let the inappropriate jokes fly on their own. 

Happy Wednesday, Loyals.

Tuesday, October 23, 2012

Magnetic Closure Babywear :: Greatest Invention Ever And A Giveaway!


Moms, say goodbye to those frustrating middle of the night diaper-changings, struggling with   misaligned snaps and stuck zippers. Magnificent Baby seamlessly eliminates all of that with their incredible magnetic closure footies and sleep gowns. 


Let me introduce you to Magnificent Baby by way of the fabulous online Mommy/Baby boutique Bloom MaternityThis is undoubtedly one of those "why didn't I think of that" products. 
"Simply open the footie, insert baby and the outfit practically dresses itself."


As a mom or simply anyone who has struggled with changing a wiggly, fussy, crying baby, we know how difficult it can be to get the baby dressed with minimal tears and frustration. Throw in a 2am feeding, little to no sleep, a darker than dark bedroom and a diaper that needs changing and the task of changing said diaper becomes all the more anxiety-producing.

First there is the task of stuffing the baby into the footie. Then you must line up the snaps and begin snapping them together, all the while shushing the unhappy baby in hand. Midway through, you suddenly realize that you've either missed a snap or snapped a chest snap to a knee snap and your poor little baby is now even more upset. You must go through the motions again, with an even fussier baby, trying to redress them again and again. 

With it's lead safe, phlalate safe and baby safe magnetic closure strips, these footies and sleep gowns by Magnificent Baby make those middle of the night diaper changes easier than catching a greased piglet in a bowl full of butter. 


You simply dress baby as your normally would, inserting their arms into the sleeves and their legs into the.. leg parts? and without having to align any snaps, you simply bring together the two sides of the garment, attracting the magnets and voila! Instant footie and you're both ready to head back to bed.

Here is Maclane looking dapper in his Magnificent Baby footie in the Morocco print. Doesn't he look pleased as pie? That's because his Mommy didn't keep him awake any longer by having to fumble with those ridiculous snaps in the middle of the night. 


You can shop Bloom Maternity's entire selection of Magnificent Babywear by clicking here. You can even use code "carrots" for 10% off of your order

Today, Bloom Maternity has offered ONE lucky Loyal the chance to win their very own Magnificent Baby footie with a coupon code valued at $32.95. Be sure to enter using the handy Rafflecopter widget below.


a Rafflecopter giveaway

Monday, October 22, 2012

Extended Rear-Facing Made EASY With The Graco Snugride ClickConnect 40

What do you get when you mix cupcakes, the brand new Graco Snugride ClickConnect 40, the ONLY newborn to two year infant car seat on the market designed to protect children 4-40lbs. in the rear-facing position and 12-ish really excited Mom-Bloggers? 

A party, of course! 

Last week I dusted off a pair of heels I hadn't worn in over a year, donned an outfit that hadn't recently been spit-up on and drove out west to a local #GracoSafety event hosted by the darling Stephanie of A Belle Reve

After an hour of mingling and swapping baby stories we gathered around the guest of honor and ooh'd and ahh'd over Graco's latest car seat release: The Snugride ClickConnect40. Isn't she pretty?


This car seat is absolutely incredible. Not only is it the only car seat on the market designed to safely protect children in accordance with the American Academy of Pediatrics guidelines by providing the most leg room for baby but it's lightweight, fashionable and functional, too! 

I know what you're going to ask next. "How can one car seat accommodate a baby from 4-40lbs?" Simple. With an 8 position one-touch base with leveling adjustment. The 8 positions are what allow for the most leg room for your baby.


The base also houses this ridiculously adorable {and adjustable} kick-plate. 


The ClickConnect40 also includes a one hand height-adjustable head rest and no-rethread harness for best head protection. How many times have you struggled with un-threading and re-threading those doggone harness straps to grow with your child? With Graco's no-rethread technology, you can adjust the harness practically one-handed!


One would imagine that a car seat that can accommodate 4-40lbs. probably weighs a ton more and is cumbersome to lug around. At least that's what I anticipated. I'm here to tell you that this is not the case. Carrying Maclane to and from the car and on various errands in the ClickConnect40 does not feel all that much different than lugging him around in his previous infant car seat. 


My only issue with this car seat is that it is not compatible with the previous stroller adapters for the Graco Snugride car seats. This means that this car seat does not fit the adapter for the previous BOB Jogging Stroller nor the Snap-n-go Strollers. There is, however, a new adapter available for the ClickConnect model car seat. 


Within days of receiving our brand new car seat I couldn't wait to test it out and what better maiden voyage than a five hour trip to New Jersey? Maclane rode both safely and comfortably and if that isn't a win in this mom's book, I don't know what is. With my history of growing extra large babies, I am so happy that the brilliant innovators at Graco designed a car seat built to accommodate extended-rear facing babies as recommended by the AAP guidelines.  

Other takeaways regarding the Snugride ClickConnect 40 include:

- Convenient LATCH system but can also be secured safely without base using a tethered lap belt if absolutely necessary. 
- Rigorously crash tested to meet or exceed US Safety Standards
- Removable infant and preemie cushion inserts
- Side impact tested {in addition to the US Safety Standards} and made with energy absorbing foam for effective impact energy management.

The Graco SnugRide® Click Connect™ 40 – the first and only newborn to two-year infant car seat that actually grows with your baby from four pounds all the way up to 40 pounds. The car seat is designed for a parent on the go. The infant car seat can be easily removed from the base and used as a carrier when the infant is small, providing portability and convenience so you can easily move your infant in and out of the car without disturbing them.

The American Academy of Pediatrics recently made the recommendation to keep all children in rear-facing car seats until the age of 2. Graco set out to make this product so parents can keep infants rear facing longer while still keeping them comfortable.

This is a sponsored post written by me on behalf of Graco. This car seat is available for retail at Babies R Us. I did not receive any monetary compensation for this post however I did receive the Graco Snugride ClickConnect40 car seat in exchange for my honest review. The opinions expressed above are my own.

Candy Apple Turkeys :: Hey, That's Pin-Tastic!


Growing up, never a holiday did pass without some sort of accompanying craft that my mother somehow finagled me into doing. One of my earliest memories of a fun Thanksgiving craft was making these Candy Apple Turkeys with my Brownie Troop. Of course my mother was the troop leader. 

This craft is super simple. So simple, in fact, that I was able to recruit my almost two-and-a-half year old to help, under close supervision mind you. 

What You'll Need: 

1 Red Delicious Apple
8-10 toothpicks
Spice Drops
Candy Corn
Circus Peanuts
{Each of the above can be found in the $1-2 candy section of the grocery store)
Cheerios or O-type cereal

What You'll Do:

1. Decide how many "plumes" you want your turkey to have and start sliding your spice drops onto your toothpicks. You'll want to leave some room at the bottom so that you can easily push your toothpick into the apple. 

2. Once you've decorated your "plumes," lay your apple on its side (stem facing you) and gently stick the "plumes" towards the mid-to-back end of your apple. Remove the apple's stem by gently twisting it. 

3. Insert two toothpicks in the underside of the apple, towards the front. These sticks will serve as the turkey's legs. Push them in far enough so that only a small bit remains seen. Attach your two circus peanuts as the turkey's feet. 

4. You'll need to create a "tripod" effect so that your turkey is able to stand. Turn your apple over and insert a third toothpick towards the back of your apple enabling your turkey to stand upright. 

5. To make the turkey's beak, you'll want to insert a toothpick through the center of the apple where the stem once was. Leave a small bit of the end showing and press your candy corn onto the exposed toothpick. 

6. To make the turkey's eyes, you'll want to do something similar. Insert your two toothpicks almost as far as they will go. Leave a small bit of the end showing and "hang" a cheerio on each toothpick. 

7. All the while, make ridiculous "gobble gobble" sounds. 

There you have it! A quick and easy Thanksgiving craft to enjoy with your little ones!


Hey, that's Pin-tastic, no?

Be sure to link up your pin-tastic posts below! Today's post was not based on a pin, simply a fun little activity I decided to do with Carter while home in New Jersey. However, I'm sure there are a billion similar pins out there. 

Remember, choose one pin each week to make, bake, create or decorate. Most of all, just do! Take a few pictures, write it out, add the ILYMTC "Hey, That's Pin-tastic!" button and come back here every Monday to link up! 

As always, posts that include the button will be pinned to the ILYMTC Hey, That's Pin-tastic pin board!

Friday, October 19, 2012

Rag Ribbon DIY Fall Wreath

Each year I promise myself that I will wait until September 1 before decorating for Fall with reckless abandon. Once that first day of September rolls around, the gloves come off and the self-restraint goes down the toilet. 

I'm pulling this post from the ILYMTC archives to share with you, once again, one of my most favorite Fall crafts, The Rag Ribbon DIY Fall Wreath. I don't have a sewing bone in my body, but I sure can craft with the best of 'em and this wreath is one of the easiest I've ever made. Especially when said craft involves tying ribboned knots to a piece of wire wreath


What you'll need:

1. An 18" wire wreath, as seen in both Michaels and Hobby Lobby. 
2. 12 spools of coordinating ribbon (4yds each). 
3. A fancy bow, if you feel so inclined. 

My wise word of advice: Forget what your Mama told you about less being more. When dealing with ribbon, less is not more. More is more. 


What you'll do:

Start by cutting each spool of ribbon into strips. I eyeballed 6" strips. The longer they are? The easier they are to tie. You can always go back and trim later. Stack them into pretty neat rows, if you wish. 

Haphazardly start tying your strips of ribbon onto your wire wreath. I started on the second ring in from the top. Once my ADD kicked in, I started tying random pieces of ribbon all over the place and then filling in the gaps. Have fun with it. It's a simple knot. No fancy bow. Just a knot.


Knot away. And when you think you're done? Keep knotting. If you have a loving Husband like mine, you'll show him your work, bragging left and right and he'll lovingly point out each area that needs an extra ribbon, or twelve.


The whole process from start to finish takes about 2 hours. 3 hours if you stop to have a glass of wine. 

Once done, step back and admire your handiwork. This wreath was a gift for my Mama. As you're reading this, I'm almost done crafting a smaller wreath for the Christmas season. You can never start too early, am I right? 


If you decide to tackle this DIY wreath be sure to take plenty of pictures as I'd love to see what you whip up! 

Happy Fall! 

Related Posts Plugin for WordPress, Blogger...